Constraint
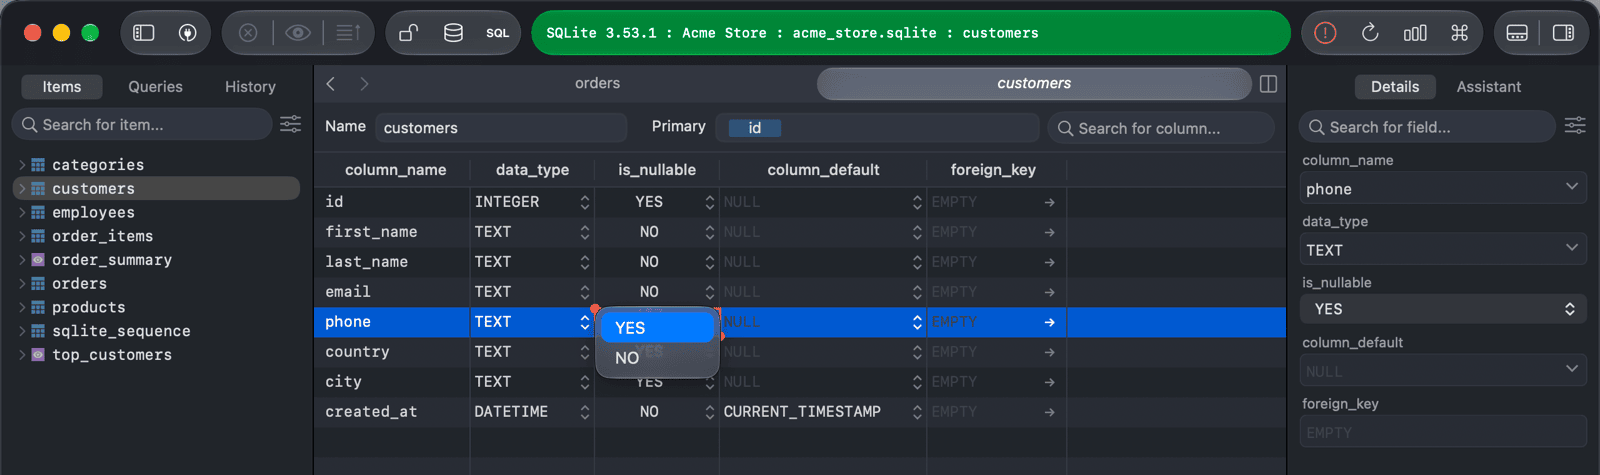
You set constraints on the columns of a table in its Structure tab. To open it, click Structure at the bottom of the window or press ⌃ + ⌘ + ]. Changes are kept locally until you press ⌘ + S1 to commit them to the server.
NOT NULL constraint
- Open the table's Structure tab.
- Set the column's
is_nullablefield:- NO adds the NOT NULL constraint, so the column can't contain
NULL. - YES removes the NOT NULL constraint.
- NO adds the NOT NULL constraint, so the column can't contain
- Press
⌘ + Sto commit the change.
PRIMARY KEY constraint
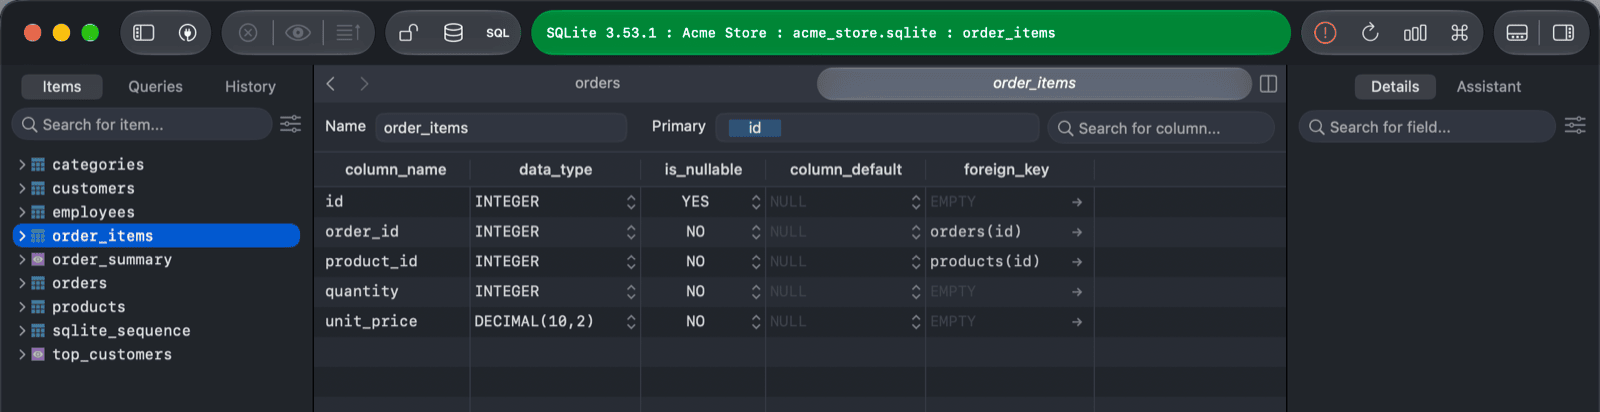
The primary key of the table is shown in the Primary field at the top of the Structure tab.
- Open the table's Structure tab.
- Edit the Primary field:
- Add a column name to include that column in the primary key. TablePlus suggests the table's columns as you type.
- Delete a column name to remove that column from the primary key.
- Press
⌘ + Sto commit the change.
FOREIGN KEY constraint
- Open the table's Structure tab.
- Click the arrow in the column's
foreign_keyfield and choose Create a foreign key on column name. - In the popover, choose the Referenced Table and the Referenced Columns, and the On Update and On Delete actions (NO ACTION, RESTRICT, CASCADE, SET NULL, or SET DEFAULT). Click OK.
- Press
⌘ + Sto commit the change.
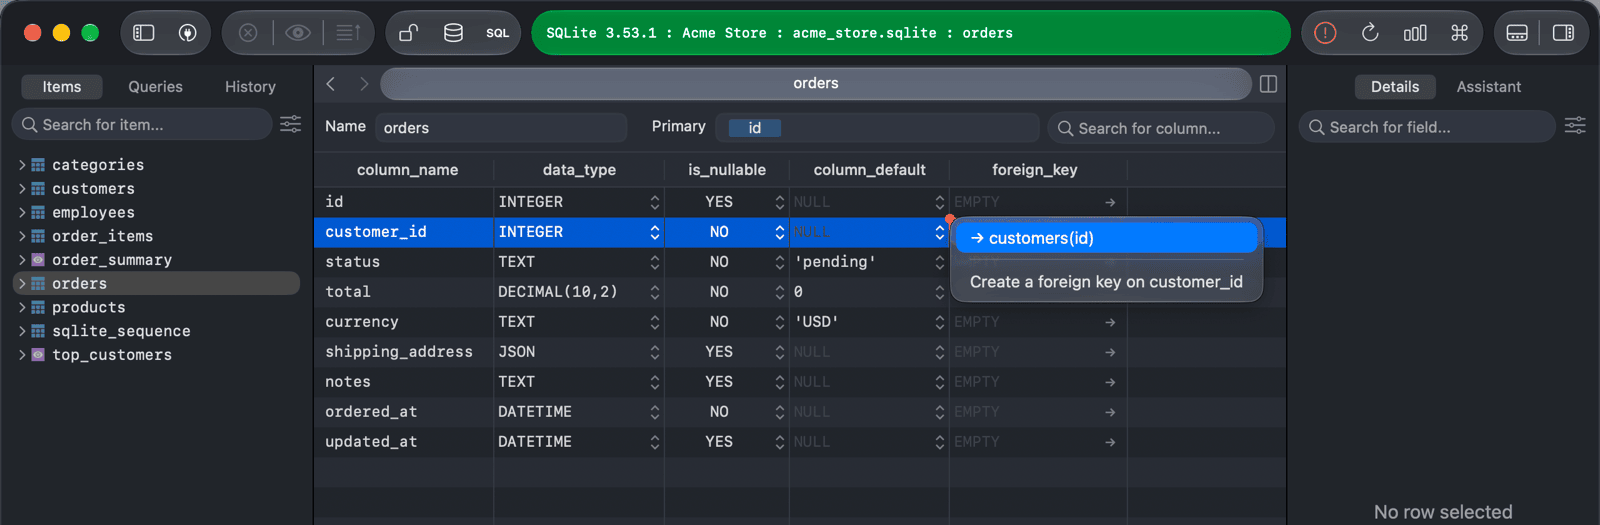
The same menu lists the existing foreign keys of the column, for example → customers(id). Choose one to see its details, change it, or click Delete to remove it.
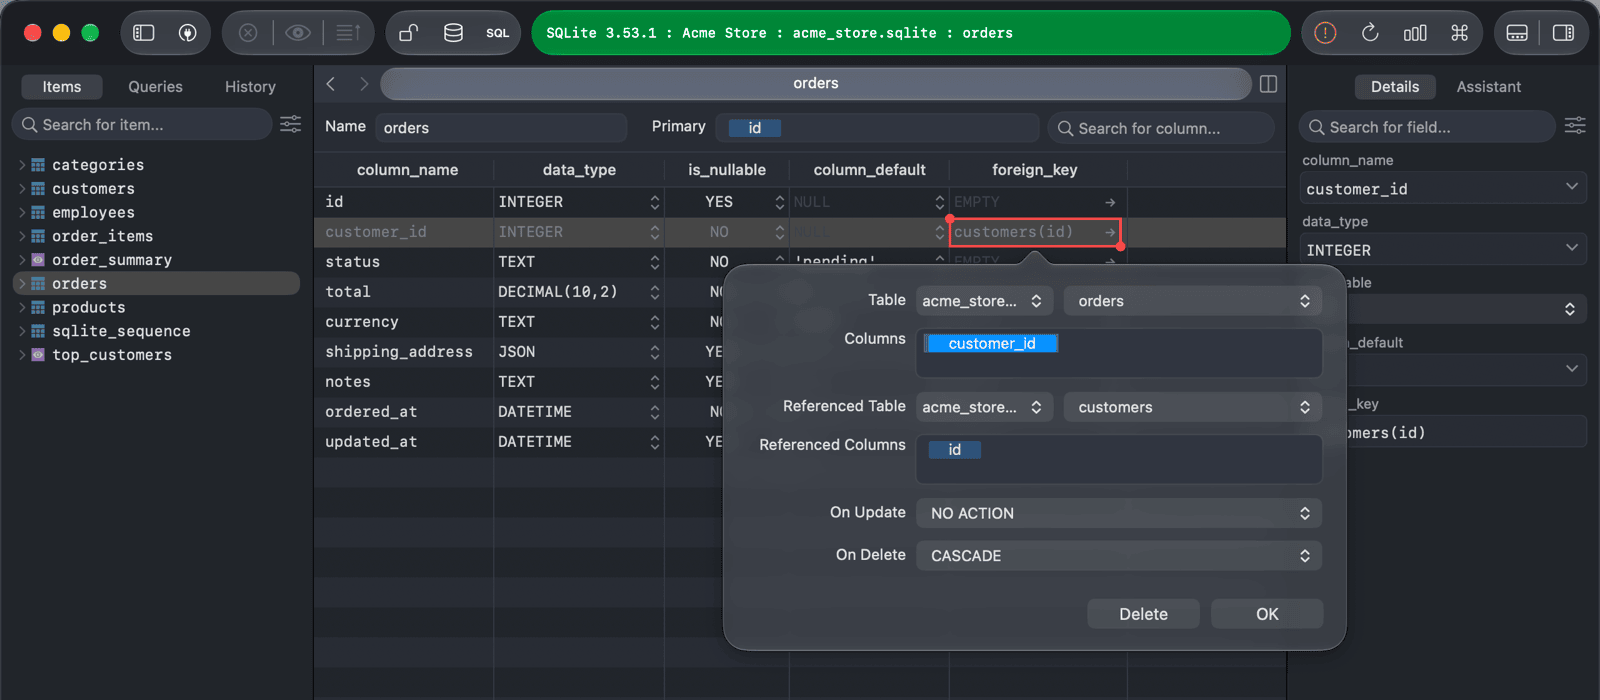
TablePlus can't add or remove foreign keys on an existing SQLite table. You can still view them.
CHECK constraint
A check is a condition that every row of the table must meet, for example total >= 0. The checks of a table are in the Checks popover of its Index tab.
- Open the table's Index tab: click Index at the bottom of the window.
- Click Checks. The popover lists each check with its
check_name,column_nameanddefinition. - To add a check, click + Check, or right-click the list and choose New Check. Enter a
check_name, or leave it empty to let the database name it, and type the condition indefinitionwithoutCHECK (...). - To change a check, select its cell and press
Return, or click the selected cell again. To remove a check, right-click it and choose Delete. - Press
⌘ + Sto commit the change.
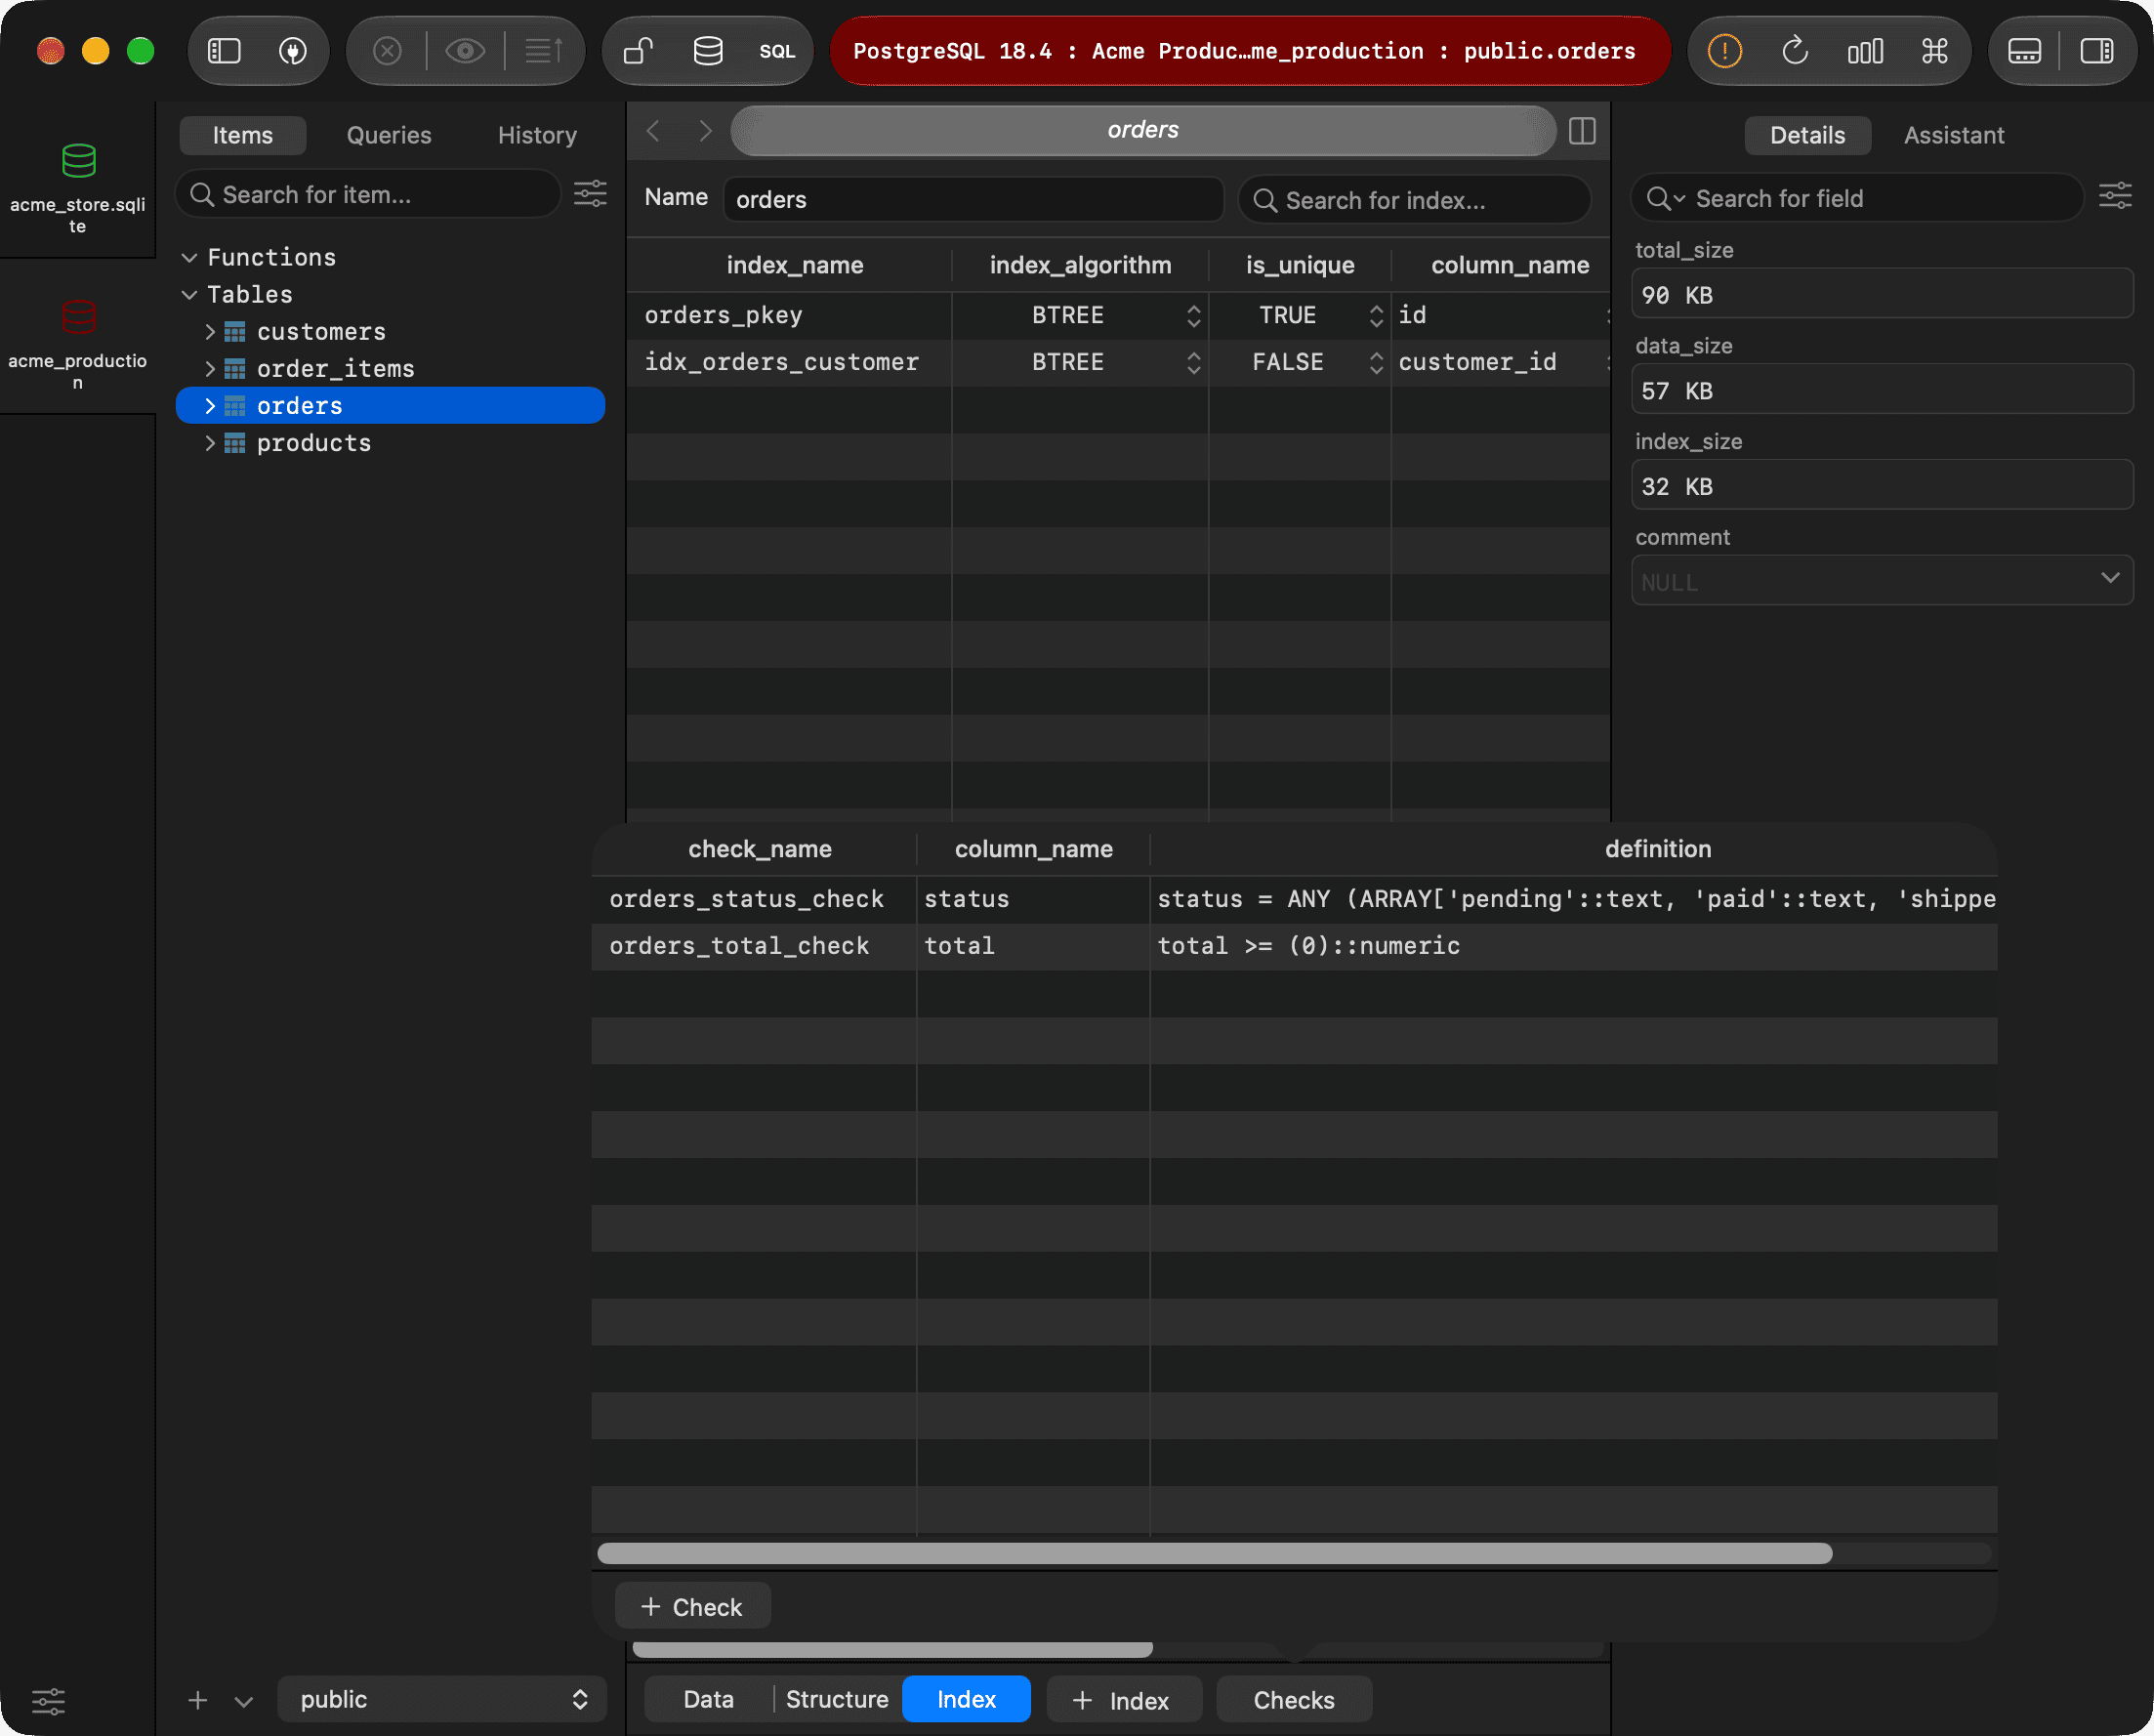
The database fills in column_name from the condition, so you can't edit it. When you change a check, TablePlus drops it and adds it again with the new condition. The Structure tab also shows the checks of each column in its check column. Edit them with the Checks button.
You can add, change and remove checks on PostgreSQL, CockroachDB, Greenplum, Vertica, MySQL 8.0.16 and later, MariaDB 10.2.1 and later, SQL Server, Oracle 12.1 and later, and ClickHouse. On ClickHouse, which has no Index tab, the checks are in a Check tab at the bottom of the window. SQLite, libSQL, Cloudflare D1 and DuckDB show the checks of a table, but can't add or remove a check on an existing table.
DEFAULT constraint
- Open the table's Structure tab.
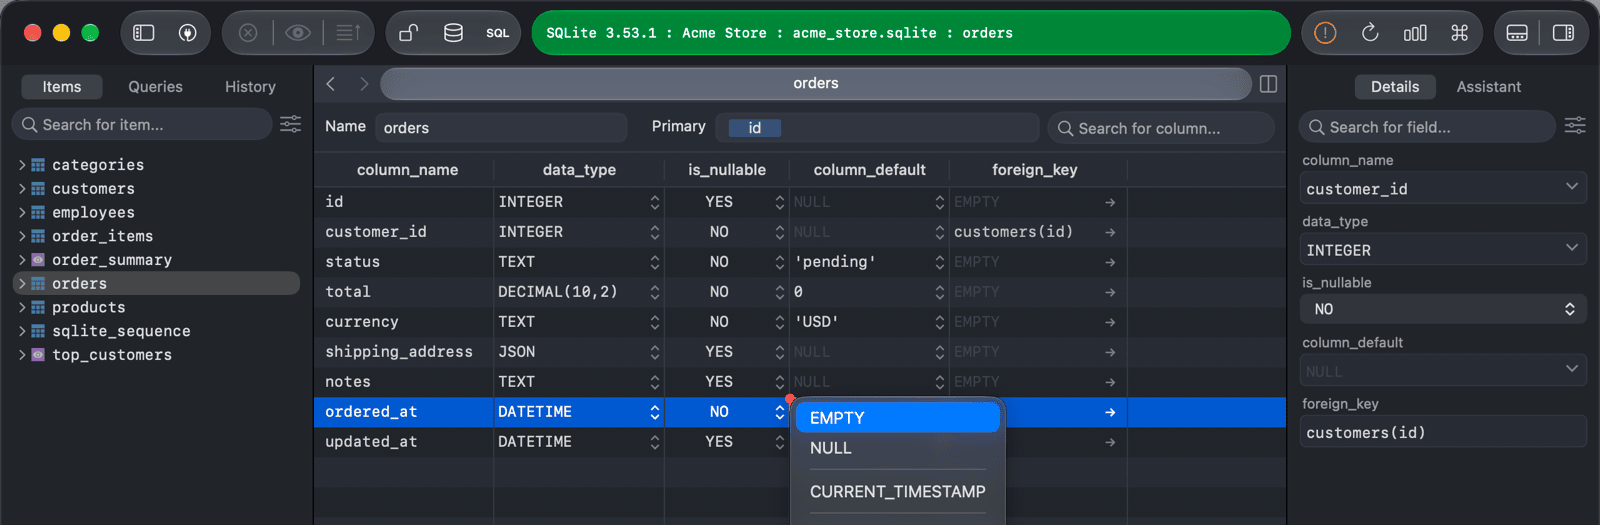
- Enter the default value in the column's
column_defaultfield, or click the field's arrow to choose one: EMPTY, NULL, or a common default for your database, such asCURRENT_TIMESTAMPorNOW(). Choose Advanced... to set an expression, or a sequence on PostgreSQL. - Press
⌘ + Sto commit the change.
-
On Windows and Linux, use
Ctrl + S. ↩︎